The 3 Period Lesson
The “three period lesson” is used throughout the Montessori environment to help introduce a new lesson/concept and lead the children along a path to understanding and mastery. In the area of language this is used to increase, enrich, and broaden a child’s vocabulary.
It’s important to practice the method of presenting the Three Period Lesson several times until you are comfortable giving it with ease. There are no set movements or patterns that you must follow in each of the periods. As long as you understand the principle of the period, and keep it simple and focused, you can ask the child to do whatever is appropriate for the setting, object, or concept you are teaching.
Begin by presenting the child with three objects of contrast and isolate them on a table or mat. In this example, I will be using 3 landmarks from our Landmarks of the World collection: Big Ben, Taj Mahal and Pyramids of Giza.
1. First Period: Naming Period
This period is short as it simply involves giving the object a name (“THIS IS”).
a. Pick up the object and say “Big Ben” while showing it to your child.
b. Repeat it clearly and slowly several times. As you do this, show and let the child feel the object.
c. Continue on with the second and third objects. In this case, the Taj Mahal and Eiffel Tower.
d. Once you’ve named them, review them one more time by pointing or holding each of them individually.
2. Second Period: Recognition and Association
This period is longer as it involves recalling the objects repeatedly (“SHOW ME”).
a. Note the object that the child knows best. (Micah loves the Big Ben and it quickly became his favorite. He remembered it right away because he associated it with his uncle’s name which was Ben.)
b. Rearrange the objects and ask the child to show you a specific object.
“Can you please show me the Big Ben?”
“Put the Taj Mahal on your head.”
“Hand me the Eiffel Tower.”
“Put the _______ here/ there/etc.” You can point to a spot on the table/mat or in the child’s body.
c. Important reminder: this is not the time to test the child.
You can extend the handling and movement of the objects to encourage kinesthetic memory. This also allows the child to solidify his recognition of the object’s name. Make it fun and interactive. Be as creative as you want. The more engaged your child is the more he/she will want to continue. This period is the most critical therefore the longest. It’s all about REINFORCE AND REVIEW.
3. Third Period: The Test
This involves asking the child to verbally recall for the first time the name of the objects (“WHAT IS THIS?”).
a. Place the 3 objects back in front of the child.
b. Point to the first object and ask the child, “What is this?”
c. Repeat with the second and third object.
It is important to proceed to this period only if you feel the child will be successful. If the child is unable to recall the names of the objects, simply give them the names again or repeat the second period.
We have the hardest time remembering the times in the middle of the list. The items at the beginning and at the end are easier to recall. To help your child ease his/her way to recalling the names, here are some tricks you can use:
1. Make sure you place the new object at the beginning or the end.
2. Place the object that your child knows best in the middle to increase his comfort level.
3. The last object can be new or somewhat familiar to the child.
If you decide to continue after he/she has made a mistake or has forgotten the name, begin with the last object mentioned, kindly reinforcing it immediately. Even if you rotate the objects, always put the familiar one in the middle.
If the child is unable to recall the names of the objects, simply give them the names again, and casually end the lesson without making the child feel as though they’ve failed.
Remember to always make learning fun! Your child should find joy in discovering new things. He/she should not fear making mistakes because it’s all part of the learning process. 🙂 Hope you’ll enjoy doing the 3 Period Lesson with your little one!
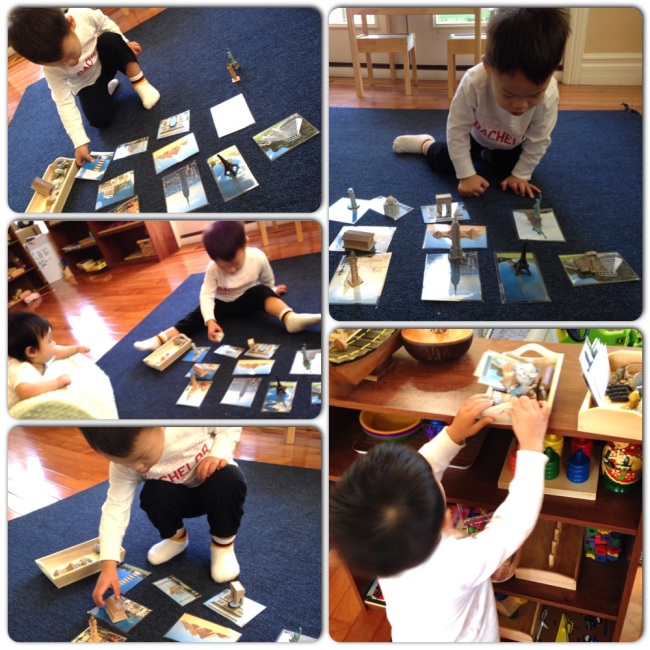
*Micah really enjoyed learning about these landmarks and we have moved on to the second set. The landmarks in this collection include: Eiffel Tower, Leaning Tower of Pisa, Statue of Liberty, Arc of Triumph, Taj Mahal, Parthenon, Temple of Inscriptions and Pyramids of Giza. The pictures did not come with the collection. I just googled the images of the landmarks, printed them and laminated them so he can match the items with the pictures.


 I use the cube box to hold his books.


